Post Previews
When editing content in the WordPress editor, content creators can click the Preview link to preview what the content will look like on the frontend before the post has been published. This docs page outlines how to set up post previews in a headless WordPress app.
0. Prerequisites
Ensure that you have completed the steps in the following pages before proceeding.
Implementing authentication is necessary so that Faust.js “knows” whether the current user has the permissions necessary to view draft posts. Template hierarchy support is necessary so that Faust.js can query for draft blog post data and render it using the appropriate page template.
1. Update the _app.js file
Navigate to pages/_app.js file and import your faust.config.js file that you have created in the previous steps like so:
import "@/styles/globals.css";
import "../faust.config";
import { useRouter } from "next/router";
import { FaustProvider } from "@faustwp/core";

export default function MyApp({ Component, pageProps }) {
	const router = useRouter();

	return (
		<FaustProvider pageProps={pageProps}>
			<Component {...pageProps} key={router.asPath} />
		</FaustProvider>
	);
}
2. Update the next.config.js file
Before we update the next config, we will need to install the next-secure-headers package that we will use in it.
In your terminal, run the following command:
npm install next-secure-headersNow that we have that installed, go to the root of your project and update your next.config.js file with this code:
const { withFaust, getWpHostname } = require("@faustwp/core");
const { createSecureHeaders } = require("next-secure-headers");

/**
 * @type {import('next').NextConfig}
 **/
const config = {
	reactStrictMode: true,
	sassOptions: {
		includePaths: ["node_modules"],
	},
	images: {
		domains: [getWpHostname()],
	},

	async headers() {
		return [
			{
				source: "/:path*",
				headers: createSecureHeaders({
					xssProtection: false,
				}),
			},
		];
	},
};

module.exports = withFaust(config);
This configuration integrates Next.js with your headless WordPress setup by using the withFaust function to manage authenticated preview modes.
The getWpHostname function then passes your WordPress instance’s hostname, enabling Next.js to optimize and serve images from WordPress in both published and preview modes. Finally, the createSecureHeaders function generates essential security headers to protect your application from cross-site scripting (XSS) attacks.
3. Create Preview Page
With your headless secret set and the authorizeHandler ready to handle requests, you can now create a Next.js page for previews. Create a file at pages/preview.js with the following code:
import { WordPressTemplate } from "@faustwp/core";

export default function Preview(props) {
	return <WordPressTemplate {...props} />;
}
In this code block, We are using the WordPressTemplate component from @faustwp/core that will determine the correct page or post type to render based on the wp-templates hierarchy exports.
Just a note, we don’t use the getWordPressProps here as opposed in some other wp-template pages as we want to perform post previews in the client using CSRs.
4. Add Preview Data to Your WPGraphQL Queries Within Templates
Now that we have everything set up, it is time to add post previews to your WPGraphQL queries. Navigate to your wp-templates folder. You should have a single.js from the template hierarchy step. This single.js file is the component that is responsible for rendering post-type data from WordPress. In your single.js file, add this code block:
import { gql } from "@apollo/client";

export default function Component(props) {
	if (props.loading) {
		return <>Loading...</>;
	}

	const { title, content } = props?.data?.post;

	return (
		<>
			<h1>{title}</h1>
			<div dangerouslySetInnerHTML={{ __html: content }} />
		</>
	);
}

Component.query = gql`
	query GetPost($databaseId: ID!, $asPreview: Boolean = false) {
		post(id: $databaseId, idType: DATABASE_ID, asPreview: $asPreview) {
			title
			content
			# Add additional fields here if necessary
		}
	}
`;

// Variables function to provide the required arguments to the query
Component.variables = ({ databaseId }, ctx) => {
	return {
		databaseId,
		asPreview: ctx?.asPreview,
	};
};
In this code, the GraphQL query has an optional asPreview parameter. This parameter is passed in via the context (ctx), determines whether the component should fetch preview data for a post when asPreview is true, or the published version when false.
This approach allows for dynamic previews of WordPress content directly on the frontend. Additionally, the component includes a loading state to handle scenarios where the data is still being fetched during client-side rendering (CSR). By displaying a loading message when props.loading is true, the component ensures a smooth user experience by preventing errors due to undefined post data.
If the asPreview parameter is not required for a specific template, you can omit it, effectively disabling previews for that component.
5. Navigating to Preview Pages
Safari has an active bug where Secure cookies cannot be set on localhost, even when other browsers allow them. (Faust sets a Secure cookie for its auth implementation). See the WebKit bug report.
For localhost, it is advised to set up HTTPS, which will make previews work with Safari.
Start by logging into your WordPress Admin. For this example, we’ll create a new post.
So far, I’ve added a title and a simple line of text for the content. To view this post as a preview on your front end, click the Preview link (1). From there, click, Preview in new tab (2):
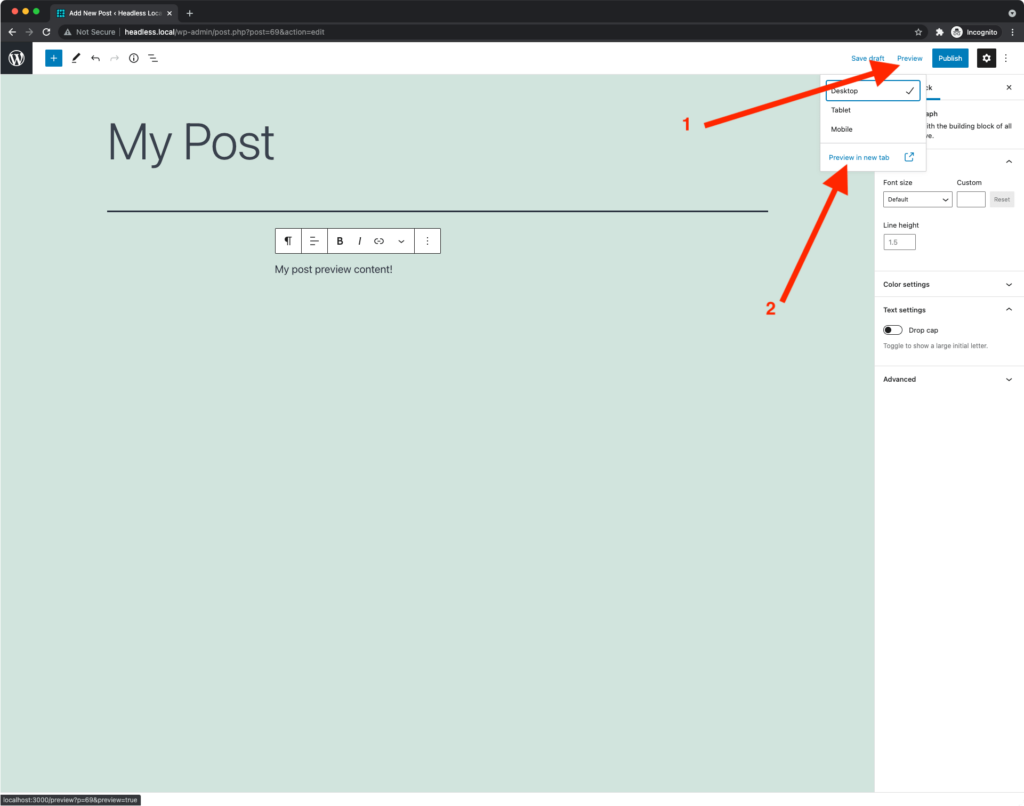
Notice that the Publish button is also visible, meaning that you still need to publish the post. Therefore, you can now view the post on the frontend without being authenticated.
Clicking on Preview in new tab should take you to your post preview page with the current preview content:
